
I’m Daniel, and I founded this project. This machine is a book scanner that I designed. It makes paper books into digital books. When I started this project in 2009, there was almost no useful information on the internet about how to design, build, and operate a book scanning machine. This 22,000 word, 56 page site is (almost) everything I wanted to share about it. The rest is buried in personal email and my 2,750ish posts on the forum, as well articles like this outstanding, short piece by Dylan Love. I think Dylain’s article the best thing ever written about this project, at least in English.
Incidentally, I’m retiring. You’re probably just getting acquainted with this project. I’m sorry that our introduction starts with my departure. I have a lot to share with you, and everyone, so let’s get right to it.
I started this project to develop book scanning technology, and to teach people how to scan the books they own. The machine you see here, which I call the Archivist (read the original announcement), is the culmination of six years of work by myself and hundreds of others. The purpose of this website is to teach you everything I know – and to feel confident in doing what I’ve done. A DIY Book Scanner is 50% hardware and 50% software, and since I’m a hardware guy, this site is going to be heavily focused on that part of things. This page is just a tl;dr/introduction version of the rest of the site, so if you go on to read more deeply, you’ll see a little repetition.
General description
A DIY Book Scanner is a simple thing. In essence, it is a rig which carefully and repeatably positions three elements — lighting, cameras and a book. The upper part of the rig holds the lights, cameras and glass in the right relationship to each other. Below that, there’s a cradle where the operator places a book, and the mechanical part of the frame allows the operator to lift the book up to the glass. The glass serves to flatten the pages of the book, and the operator triggers both cameras to take a picture of each flattened page. Because two pages are captured at once, the process is very fast – about 1,000 pages per hour for a skilled operator.
It’s important to care about the scanner operator as much as you care about books. That’s why this frame is designed the way it is — with a counterweighted, removable cradle and a design that can be operated while standing or while seated (with optional treadle attachment). Many of the design decisions in this scanner came from Daniel’s personal discussions with scanner operators from around the world who were injured by their scanners or annoyed with the way their machines worked.
Cradle
The cradle is where you put the book. It’s designed in such a way that it doesn’t matter if the book is thick or thin: you can adjust it to the thickness of the binding (up to 3.5” – after that, you have to get creative). The cradle slides back and forth on rails, because the center of the book moves as you flip pages from the beginning to the end.
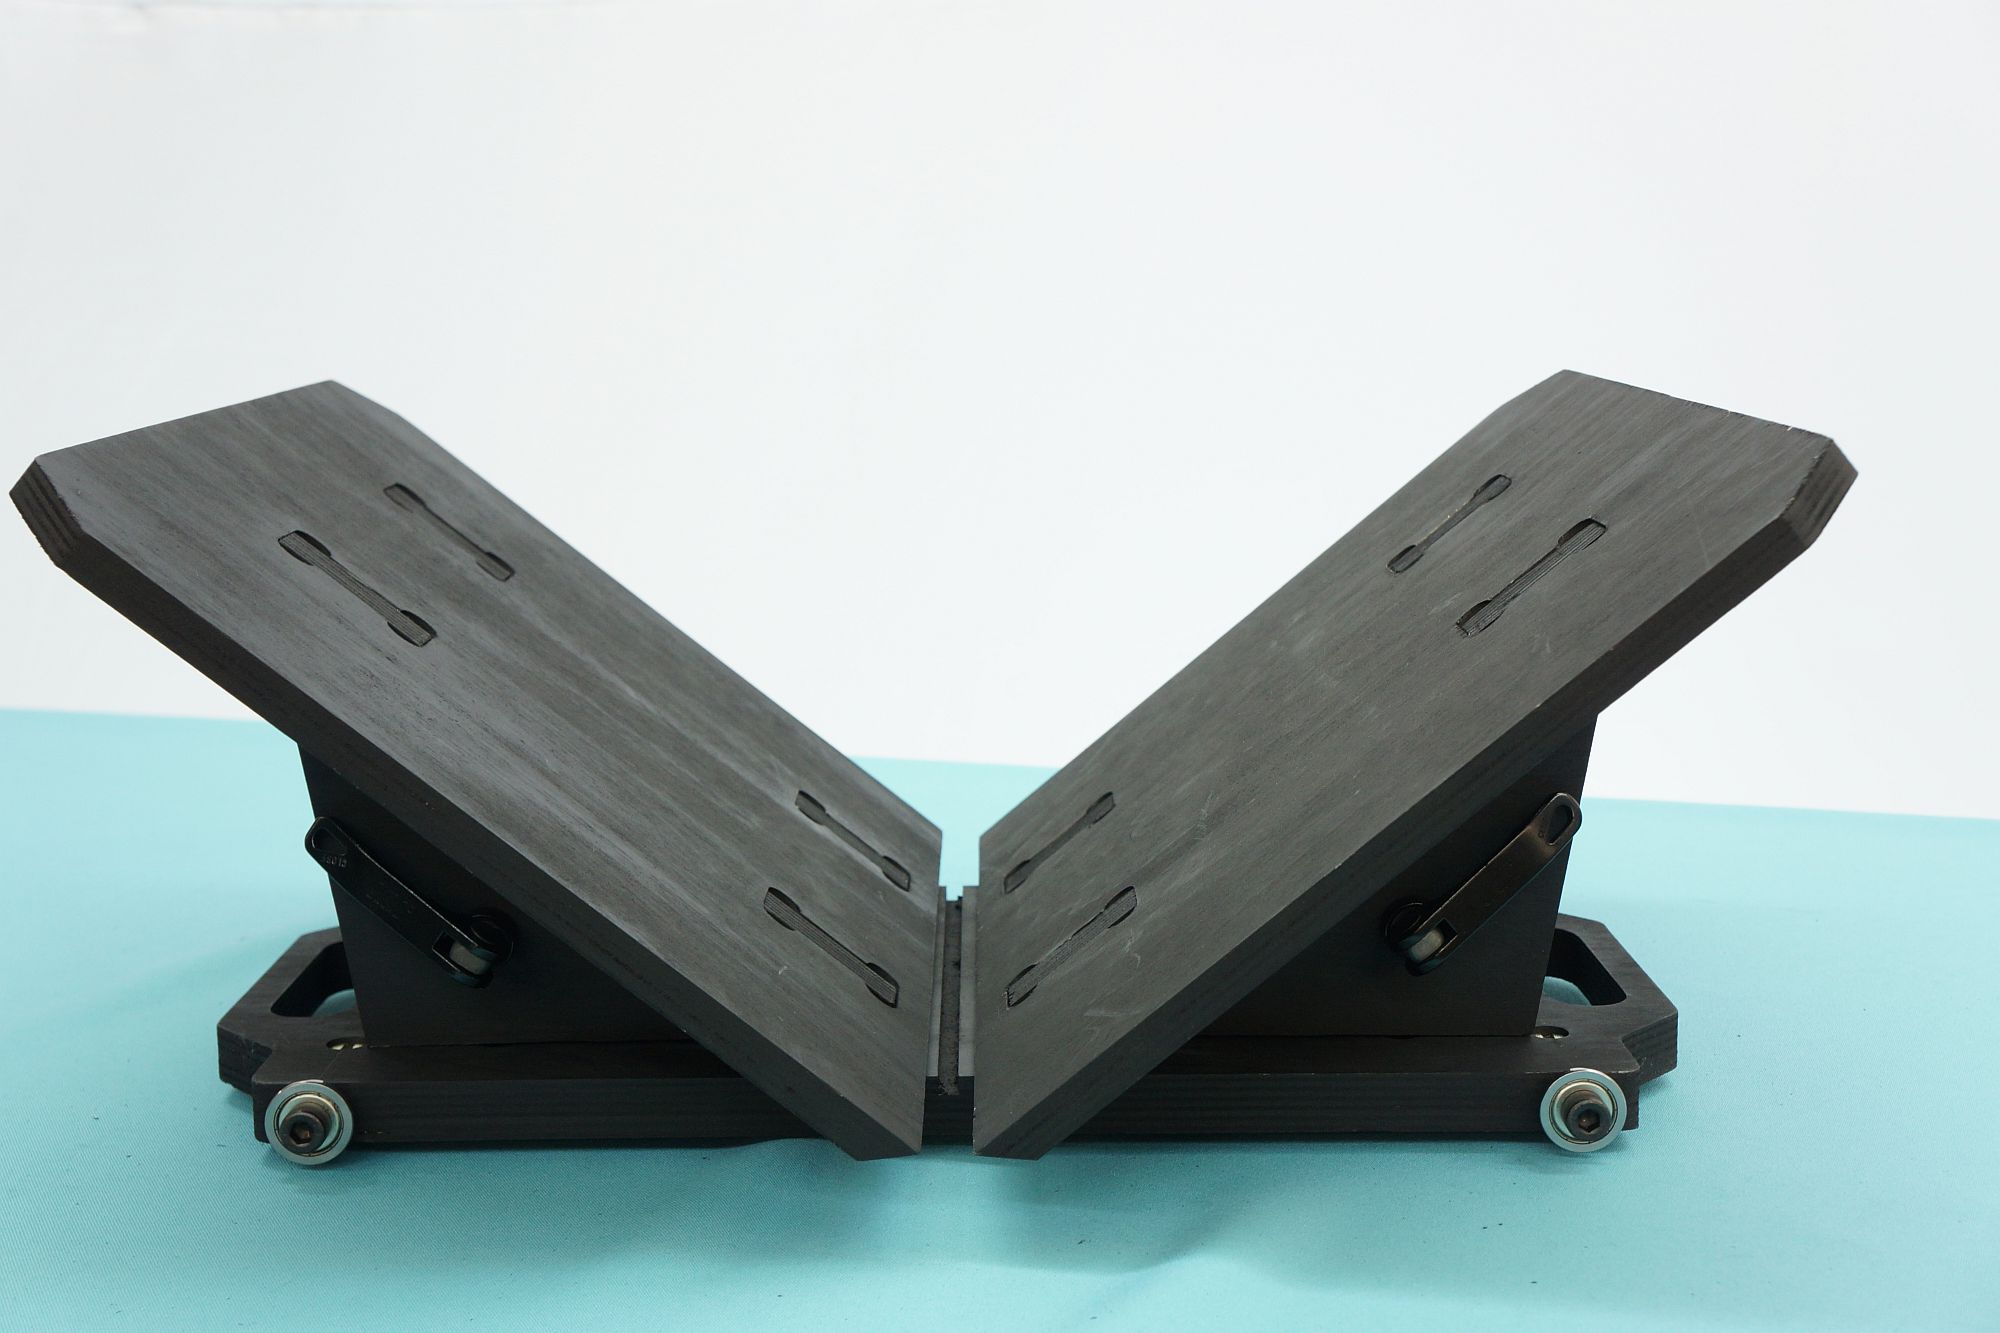
The operator can remove the cradle, put it on a table, and make any necessary adjustments before scanning. The cradle has a simple clamp system, like those on the wheels of bicycles, allowing the operator to work quickly and efficiently.
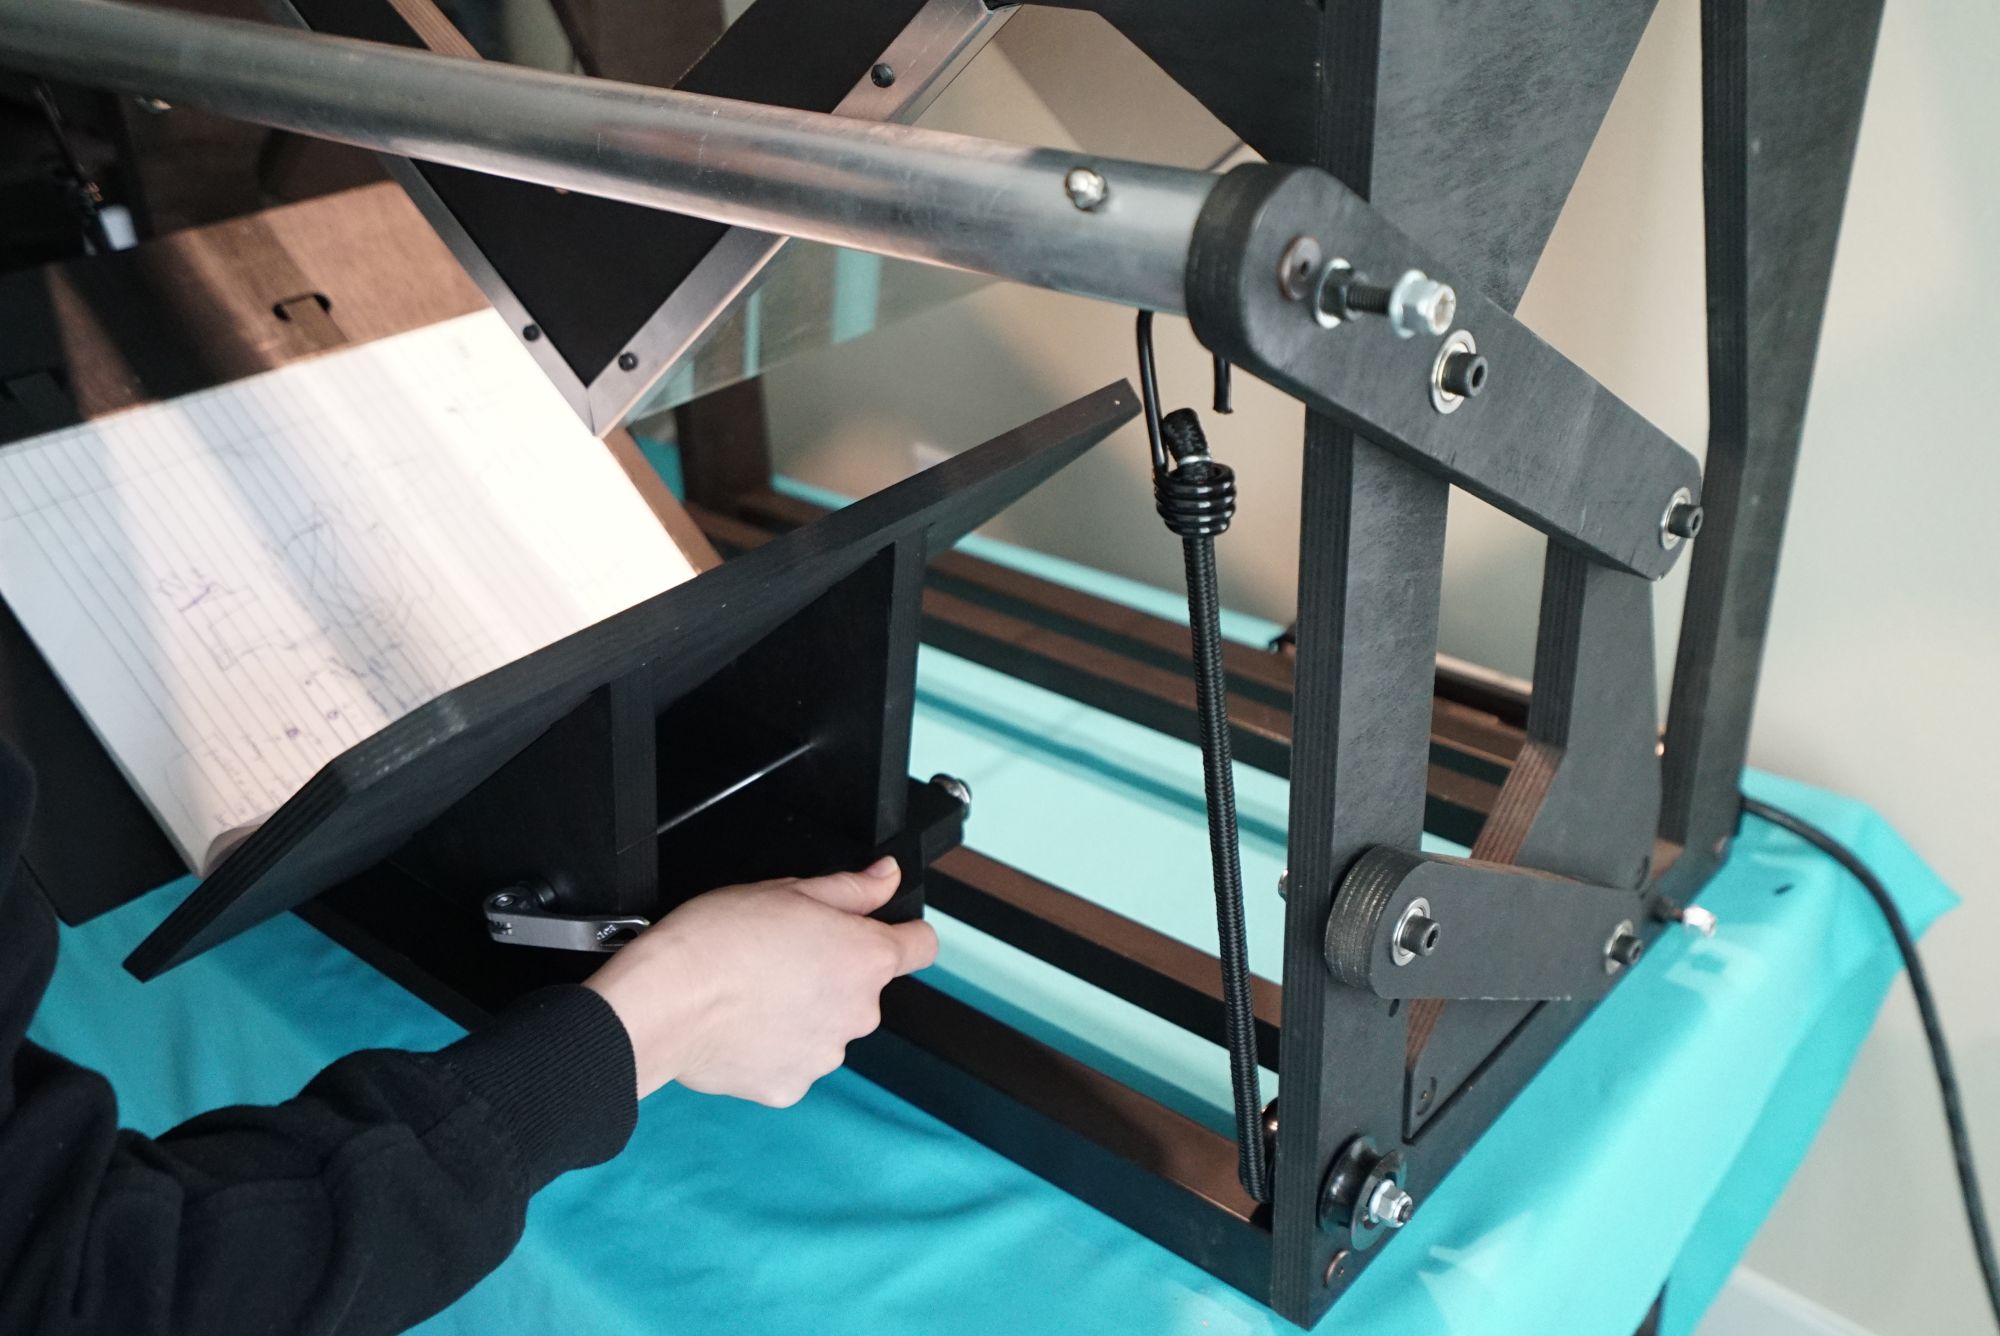
Because the cradle is counterweighted, when it is empty, it will move upwards toward the glass. We accounted for this and designed a “cradle lift stop” that the operator can lock for easy loading and unloading. The scanner comes equipped with bungee cords that counterweight the cradle. One of them is adjustable to counter the additional weight of a book. It is simple to replace these bungees with weights if you so desire.
Glass
The glass is only thing between your cameras and your book pages, so we take it very seriously.
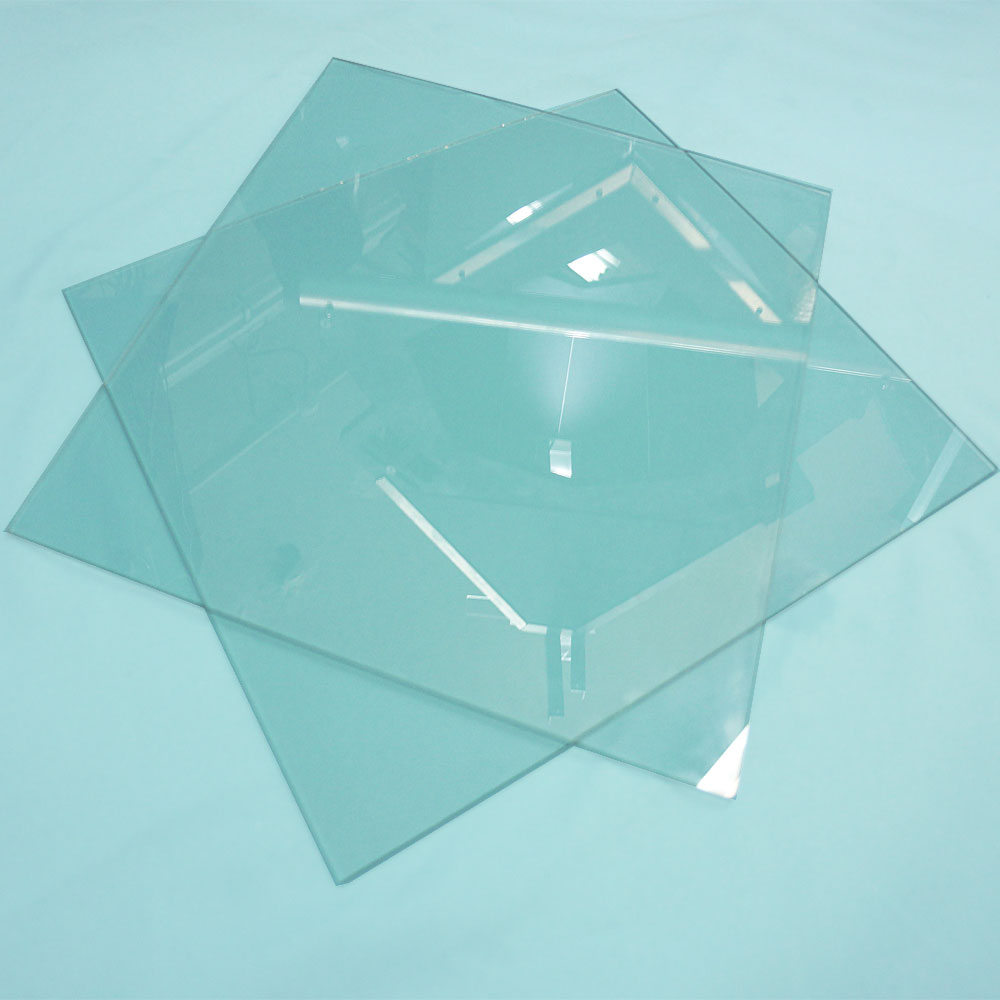
The best glass for this scanner is 3mm thick annealed plate glass with a 50 degree miter on one long edge. Water clear glass is best, but at this thickness, plate glass has negligible green tinting.
People have tried nearly every kind of glass and plastic available, including acrylic, polycarbonate, Gorilla Glass, “museum glass”, anti-reflective coated plastics, and other types, as well. Anti-glare glass, sometimes called “museum glass”, has a slightly frosted surface, but that same surface blurs the image and reduces the quality of the scan. Not only that, it’s expensive. Don’t waste your time. Anti-reflective glass has a special coating in the surface that cancels out reflections. You’ve seen similar coatings on the lenses of cameras. This type of glass is easily damaged by contact with books and also with fingerprints and dust. It also costs between $100 and $200 per square foot, so the cost/benefit ratio is wack.
Acrylic, polycarbonate, and other plastics are cheap and easy to cut and shape, but have problems. They are scratched by dust and dirt, which is a problem than it might seem because they also generate static during scanning. Worse, they’re tough to clean without damaging them further. While you’re welcome to use whatever you want, we’ve taken the time and effort to design the scanner so that only simple plate glass is necessary.
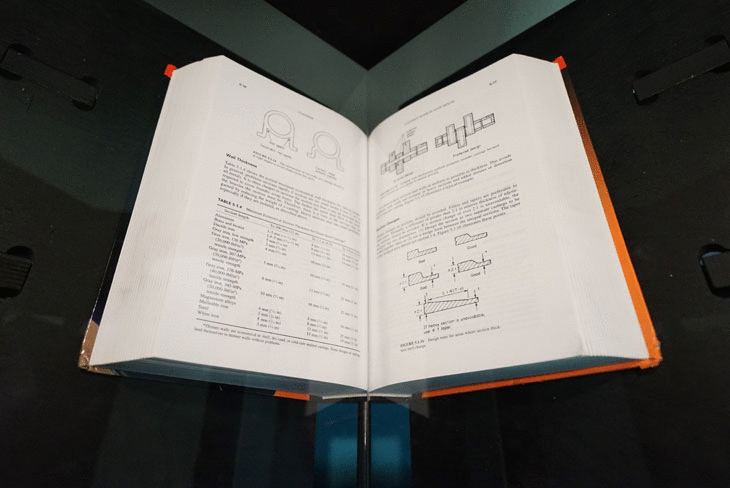
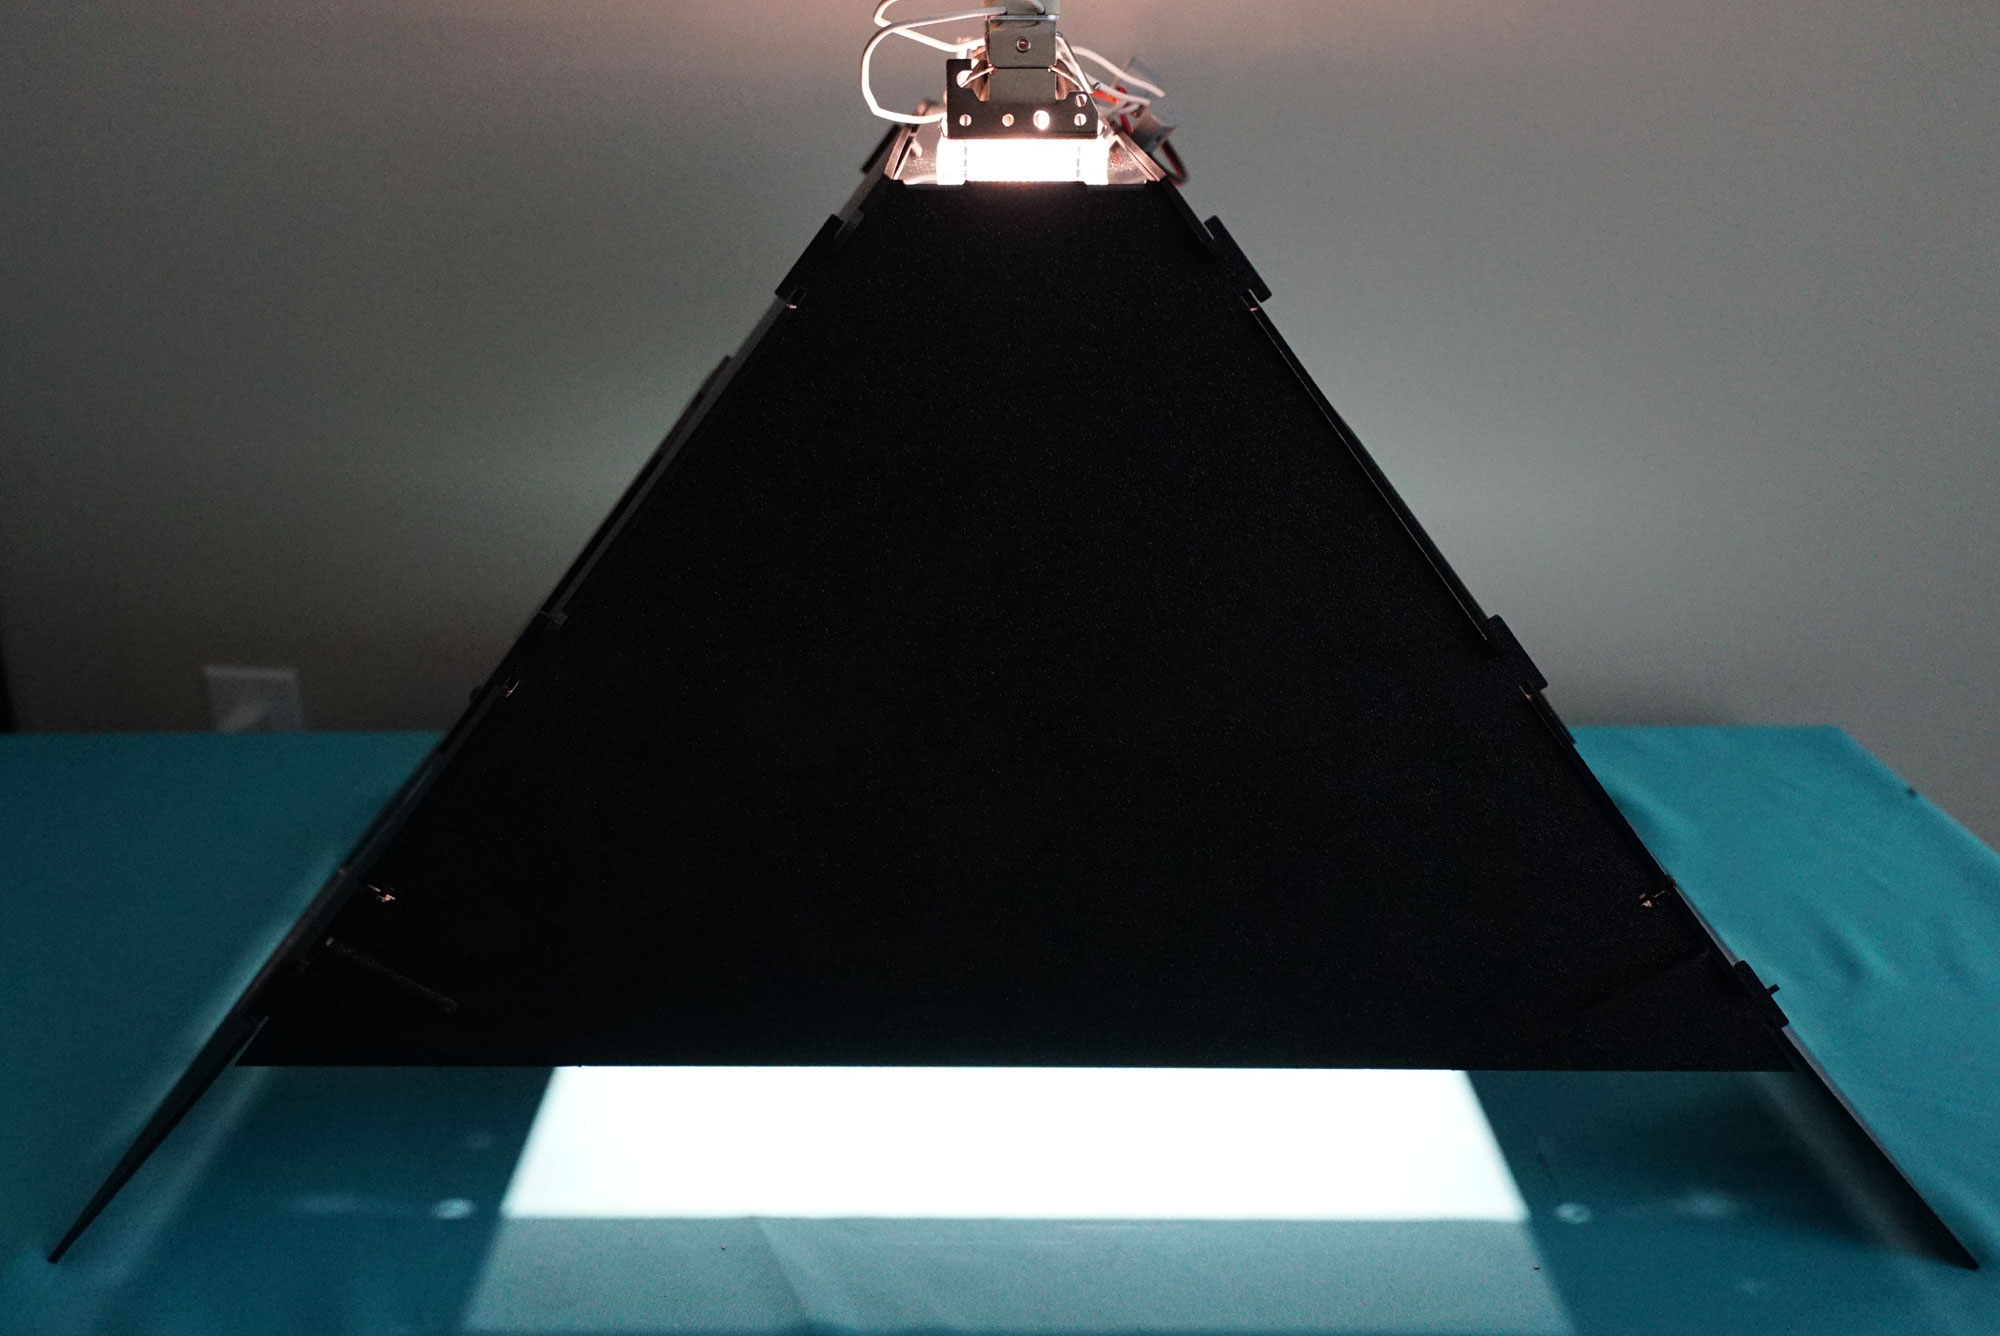
Platen/Imaging Module
The platen (pronounced like “flatten”) is the glass V-shaped part of the scanner that presses against the book. The purpose of the glass is to flatten the natural curvature of the pages. While it is possible to “dewarp” pages using software, it is not 100% reliable. It’s best to just capture nice, flat input. So I’ll get right to the point. Here:
Lighting module
The platen is part of the top half of the scanner, which we call the “imaging module”. The imaging module basically serves to hold the cameras normal to the surface of each side of the platen.
Lighting is a very involved topic. It’s best to think about it in terms of goals – our goal in scanning is usually to accurately reproduce the physical appearance of the page. To do that, we need the following:
The Archivist has a specially designed lighting system that uses refractive optics to evenly and efficiently distribute light across the scanning surface.

For compact cameras, we’d like to use them at a fast shutterspeed (1/60th of a second or higher) to avoid blur. We’d also like to use them with their apertures wide open (because compact cameras do not actually have adjustable apertures; rather they simply drop a neutral density filter in the optical path and waste light). Finally, we’d like to use the lowest available ISO to ensure the least noise in the image. Bright lighting accomplishes all three of these goals.
Color rendering is a big issue in book scanning. The Archivist lighting module features some of the most advanced LED technology available. The LEDs employed on the Archivist have a measured CRI of 95, which means that colors will come out accurately with ease. In terms of their color rendition, they are nearly equivalent to Halogen bulbs, but don’t pose a fire hazard, and also don’t have degrading ultraviolet and infrared output. On top of that, they’re very energy efficient.
The lighting system on the Archivist has several light-baffling elements and has been carefully designed to keep glare to a minimum. It excels at putting light only where it needs to be.
Cameras
The spirit of this project has been to make an affordable and accessible book scanner which takes advantage of cheap “point and shoot” cameras. All parts of the scanner have been designed with this in mind -which, of course, includes the camera supports. The camera supports are designed to hold point and shoot cameras, not DSLR cameras. However, there is rudimentary support for Nikon DSLR cameras. At this time (Q1 2015), this functionality should be considered for adventurous users.
All that said, this scanner is Public Domain and was intended to be flexible so that you can modify it. There are several kits in the wild using DSLR cameras, including the NoiseBridge scanner.
Some basic specs about the machine:
It’s bigger, simpler, and higher quality than the old Hackerspace Scanner. It can scan books up to 12×15″ (30x38cm).
Details: